If you have any experience with gaming you know very well that cooling is one very important aspect of a gaming machine that very often gets overlooked. Because of this I decided this subject needs to be addressed and gotten out of the way.
Why you need good cooling
Contents
The main reason why most consumer electronics have and need cooling is due to the inherent inefficiency of some components that can lead to melting and fire hazards. Most of today’s processors generally their Thermal Design Power or TDP specified right on the box. This is the amount of thermal energy the cooling system needs to carry away during normal operation. Average components have become a lot more energy efficient over the years but the high end has generally been very demanding on cooling systems. Generally the limit to how far you can push a component is limited by the cooling available. I remember awhile back when Tom’s hardware used liquid nitrogen to cool a Pentium processor to get the everything they could out of it and they still had headroom even with that setup.
This last point gets us nicely into the second reason why cooling is such a big deal. Once electronics start to heat up, they start losing their ability to do their job right. Processors and Graphics cards start throttling down their frequency in an attempt of getting the temperature down. This leads to drastically reduced performance from the affected component and creates a bottleneck for the other components. When you reach this point, when the hardware is frantically trying to get the heat out, you can usually just stop right there and let everything cool down. If you keep going though, the computer usually will shutdown on you while running the cooling at full blast to cool everything down. You really don’t want your game crashing at that most important moment.
As a side effect of overheating, most electronic components tend to deteriorate. Over time performance seems to drop off and this leads to less than desirable results.
Another big problem with poorly designed cooling is that as the fans start revving up they create a whole lot of noise. This noise can usually get very loud and gets very annoying and distracting over time.
Indirect heating
While you can get the heat of a specific component in check and keep it cool in operation, all that heat that gets dissipated by the cooling fins and fans needs to go somewhere.
This is a very big problem for compact gaming systems like gaming laptops and consoles. You are able to cool the processor and graphics card but in the process you insert a large quantity of heat into the case, thus heating up the RAM, HDD, motherboard, chipsets, batteries and many other components that don’t usually get hot and aren’t designed to operate at high temperature.
While most electronics can handle a hot environment, most plastics and cables don’t. The lifespan of HDDs really tends to suffer due to running in high temperature enclosures. I know I have seen plenty of melted fans and connectors on older computers. You don’t want to start a fire under you desk.
A good example of indirect heat affecting performance is when the chipset of your motherboard overheats. Because it’s usually passively cooled by the air in the enclosure, its cooling is based off of that temperature. When it start to overheat, your system either completely crashes and shuts down or you get a drastic decrease in performance of every other component.
The indirect heat leads to a much decreased lifespan of electronic components not designed to operate at high temperature.
As with cooling of individual components, the heat created by the system needs to go somewhere. Indirect heat can also affect the room the system is in. If you manage to get it out of the computer’s case it still ends up in your room. This is the very reason why server farms need to have air conditioning. A good gaming system can heat up an entire room after a prolonged gaming session. So make sure you place your gaming machine somewhere where there’s plenty of fresh air to go in and enough air circulation to get that heat away from it.
Available cooling methods
Passive or Fanless Cooling
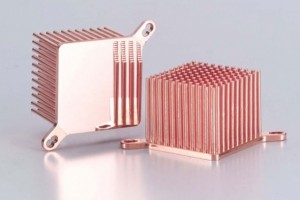
This is what your typical passive heatsink looks like.
The most basic method of cooling electronic components has always been passive cooling. This is usually done by installing an aluminium cooling element with fins to the top of the heat generating component and the air that flows past the fins removes heat and thus cools that particular component down. It is a very efficient solution requiring no moving parts or energy. Passive cooling is only limited by the amount of air that can flow by it.
A very good example of how this can work for an entire system is the Macbook 12-inch. As a first measure it has a low TDP Processor and components, so low heat production. The big cooling wizardry comes in the form of its aluminum body. The entire body of the Macbook acts as its cooling. You will never be covering the entire body with your hands or body so it can freely dissipate the heat created by its components into the surrounding air.
Chipsets on motherboard usually use passive cooling fins. Some high end RAM also have aluminium covers.
This btw. is a quick way of telling if a particular graphics card is suitable for gaming. If it only has passive cooling it was never designed for long gaming sessions, so don’t use it for that.
As processors and components get more and more efficient, this form of cooling has started showing up more and more. I really don’t recommend getting anything with passive cooling for gaming use.
The main disadvantage of passive cooling is that it’s limited by the required space and available airflow. You can achieve similar or better results with a much smaller cooling element and a fan.
Air cooled
When in doubt add more fans!
Installing a fan takes passive cooling to the next level. It uses the same principle of air flowing through a finned cooling element and just forces the air to flow and cool everything down quicker. Because of this principle you get the benefit that you always have airflow through the cooling element and by varying the fan speed you can increase or lower how efficient the electronic component is being cooled.
The big problem with fans is that as they spin up they tend to get noisy. If the cooling system isn’t big enough to cool everything down, the fans can’t even spin fast enough to push enough air to cool everything. This leads to overheating and a lot of noise.
Because of the compact and limited size regular laptops usually have undersized fans and cooling systems. That’s why most laptops specifically designed for gaming have 2 large fans. Even the consoles can sometimes overheat.
The only way you can improve the cooling of an air cooled device is to increase the airflow through the cooling elements. To do this you either add more fans or increase the cooling elements size. You can get amazing results by installing a fan to a component with passive cooling, I can tell you that much.
For PCs sometimes just installing a case fan and rerouting some cables is enough to keep the entire system cool.
You can’t really oven compact devices like Laptops and Consoles and just add more fans or cooling elements. So for them you need to help the cooling with external solutions.
In the case of laptops you can get a good cooling pad that can drastically lower temperatures. I know it helps my laptop a lot.
External cooling stands for consoles have also come out over the years and they also do a good job.
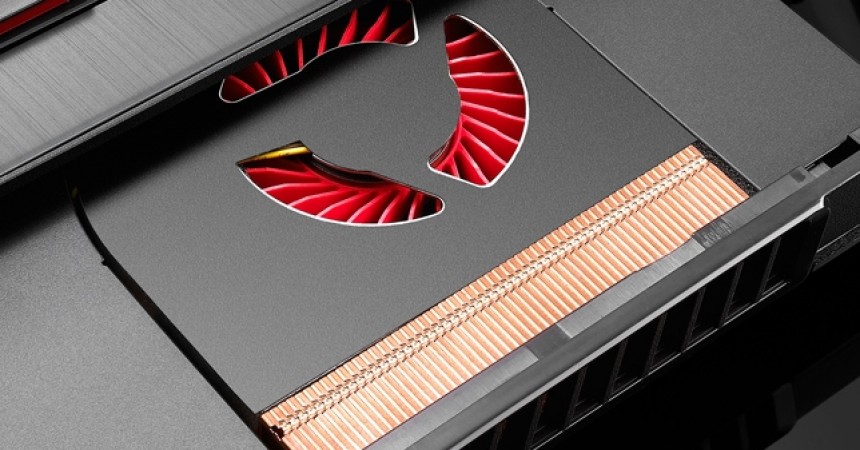
Water cooled

This is an example of a all in one water cooler from Corsair
Water cooling has been around for a couple of years now, but it’s never caught on to the mainstream. I think the inherent danger of leakage and liquids around electronics are the main reasons. Another reason might be the high cost.
The big advantage of water cooling is that you can use it to transport the heat from the individual components outside your computer case to a radiator thus not increasing the heat inside your case.
They also look very cool when viewed through a transparent computer case.
In general they are much more efficient, compact and require fewer fans and energy to run but because of their complicated setup and inherent dangers really aren’t a good solution for everyone.
Oil Bathed
I’m really not even sure if I should cover this, because it’s such an extreme solution and mod, but because I want to make this guide comprehensive I’ll write about it anyway.
This is basically passive water cooling. You put your main components that dissipate a lot of heat inside a tank filled with mineral oil. In this way all the heat created by the components gets absorbed by the oil. The regular fans designed for air, still work, be it with a lot more load due to the thickness of the fluid, and they still do the same job of moving the cooling liquid through the fins.
Depending on how much heat your system dissipates an oil cooled PC can go fully passive, not requiring any cooling of the oil, or require a radiator with pump that cools the oil down.
The main problem with this setup is that you really have to be sure about it, because one submerged you can’t really clean the electronics and can’t do many changes to them.
How to improve your cooling – General Guidelines
Let’s cover Laptops and Consoles straight away because there’s not much to say and move on to PCs.
Laptops and Consoles
As I have pointed out earlier you can’t really change anything about the built-in cooling of your laptop or console. The thing is very compact and built with very limited space. So you can’t increase the cooling element or the fan inside. The attitude here is: here it is, take it or leave it.
- If you have your gaming system for a while, the most basic thing you can do straight away is clean out the built-in cooling. Over time the cooling element gets clogged out with lint, dust and other debris that are floating through the air in your house.
Very often this can be done without opening the device with a can of compressed air and a vacuum cleaner from the outside.
Other times, you need to find a service manual and open the thing up and clean the fan and cooling element by hand. This all depends on how bad it got and how long it’s been running like that. - The other, might I say very efficient, way of cooling down a laptop or console is to buy a cooling pad or stand. By now you probably understand that air flow plays a big role here, so don’t go straight for the one with the biggest fan. Sometimes you can get something like the Cooler Master U3 that comes with 3 small high flow fans you can place under the spot you need them. This is far more efficient than something with a large fan.
The big problem with small fan designs is that they tend to be very noisy due to their high rpm. Sometimes a larger, slower fan can have the same airflow. At the end of the day it all comes down to the same problem. Either have high air flow or high noise, pick one.
Desktop PCs
Because of the generally large space available inside a PC case you can make quite a large number of tweaks to the airflow and cooling of the system. So let’s take this one section at a time.
Cleaning the case
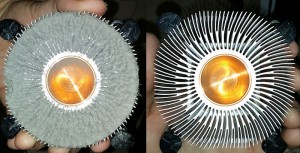
A good example of a CPU cooler after many years of usage.
As with most things that have been running for a while, the vets, fans and cooling fins get clogged up with with lint, dust and other debris from inside the air in your house. Over time a computer case can gather an astounding amount of garbage caught inside it. For an example have a look at this:
More often than not, just by clearing out all the cooling elements inside a case can restore your cooling to desired levels of efficiency.
Adding more fans
Assuming your case is clean enough and the case temperature is still too high to keep everything cool, the best thing you can do is just add one or two fans. Either in front to suck in more fresh air or at the back to exhaust the hot air or both. Now based on the orientation of the fans you can either be pumping air in or exhausting hot air out. This brings us neatly to the next thing you can do.
Optimizing air flow

This is how a case with good cable management usually looks like.
This is another one of those things that very often gets overlooked. The air that passes through the computer case has to have an inlet and an outlet. So if you build in as many fans as you can and they all pump inward, then all the hot air can only escape through the seams and holes in the case. Not very controlled or effective if you tell me.
Typically most computer cases are designed to have fans installed at a later date in them and usually favor front to back airflow. Sucking air in front, and exhausting it at the back. On some cases this can also be reversed.
Even without any additional fans, any basic power supply acts like a huge fan sucking in air from the case and exhausting it out the back. You can obviously tell why this is such a bad thing for the power supply itself and why the most basic ones tend to get damaged in 1 to 2 years.
All the cables inside the case tend to get in the way and they slow down the airflow. Cable management is the name of the game here. There are plenty of power supplies that come with cable management. You can also get thinner connectors for storage devices and components on the motherboard that further help with cable management. You could also just cable tie everything tighter together so you don’t have a furball inside your case and rout them out of the way of the airflow. Most respectable computer cased come with cable management ports that keep everything nice and tidy.
A computer case with very good air flow can usually get away with a lot of passively cooled electronics. If there is enough airflow through the case all components will be running at good temperatures. You can basically get away with a completely silent computer case with a lot of passive cooling if it has very good airflow.
Noise and Fan size vs. Fan speed
The problem with fans is that their airflow is given by their speed. So the same sized fan with a higher rpm is usually much more effective at pushing air than a slower fan. The problem with high rpm fans is the inherent noise they make. The faster they spin the more noise they make. Anyone who has experience with this can attest that very often a bigger, slower fan is much more desirable than a smaller one.
Most manufacturers try to optimize their fans fins, sizes and designs to further decrease the noise they create while still pushing large quantities of air. Some fans have rubber mountings ,unique fin shapes and ball bearings in the effort of quieting the entire assembly down.
Some people just want a silent computer and to do this you have to eliminate as many moving parts as possible. You want a very well optimized air flow and as few fans as possible with as many passively cooled components as possible.
The general way of doing this is by going with as large a fan as you can get away with. Most cases support the typical 120mm or 140mm front fan and either 2 80mm or 90mm fans at the back. Some other cases also feature 140mm fans at the back.
Generally the fan speed is controlled either by the motherboard that power the fans or, in the base of more basic setups, the fans run at full speed all the time. This is very often not desirable and not useful most of the time. The more gaming oriented motherboard come with software that lets you control the fan speed and make profiles based on what you are doing with your PC.
Because this entire noise vs. cooling game is such a big deal manufacturers have also built fan speed control panels so that you can change the fan speeds based on your needs, keeping everything quiet while working or watching movies and can get noisier during a heavy gaming session. You can even turn fans off completely if desired.
Energy requirements
The problem with installing many fans is that they all need to be powered somehow. Most motherboard usually support 1 to 3 additional case fans so they don’t have to be powered separately. In most cases though, if you are already using those ports and need to add more fans you will have to get a fan control unit or adapters that can support all of them.
Your power supply needs to be large enough(read have enough W), to support both your gaming components and all the fans, pumps and LEDs you are installing in your case. An undersized power supply will most likely require a lot of cooling just for itself and your silent setup can be quickly destroyed by the power supply’s fan running at full speed all the time. Another side effect of a undersized power supply is that once you plug in more things than it needs to power you start having problems with other components not having stable power because of it.
Optimized Cases
The easiest way to go about this entire cooling thing is to just buy an airflow optimized case and accessories from the same manufacturer. A good example of this is how a while back Arctic Cooling had their chassis sucking air from the back and exhausting it through the front underside. Because of this nonstandard airflow setup you had to have their CPU cooler that would also blow air towards the front, the power supply was placed on the floor of the case also glowing towards the front and a handful of fans placed accordingly to get the air to flow accordingly.
Another example of optimized cases are the designs that try to separate the high heat generators from the rest of the case. They do this usually by mounting the motherboard low enough so that the GPUs can stay in one enclosure while the CPU, RAM and Chipset remain above in the steady stream of air. This is another relatively smart setup.
You generally can’t play that much around with components on your typical chassis and very often an optimized chassis is desirable if you are building a high end gaming machine.
Water cooling
Once you hit the limits of what air cooling and fans can offer you, you can start looking into water cooling. They offer a much better cooling effect and usually silent in operation and you can route all the heat to the external radiator keeping your case cool. They also look very cool if you have a transparent side panel.
First off, let’s get the warnings out of the way:
- Water cooling can obviously leak and it can lead to a fire hazard and electrocution hazard
- Rubber hosing tends to deteriorate with time leading to leaks
- Once setup, water cooling can be hard to reroute or expand.
- If you decide to install water cooling in your device you are doing it at your own risk.
Now that that’s out of the way, let’s focus on how the system works.
Basically there are 2 types of systems depending on how you route the coolant loop. Serial and parallel connected cooling loops.
In a serial connected system the coolant goes from one cooling pad to the next in a serial fashion and then goes through the radiator to cool down and then get pumped back through the system. As you can imagine, this is not very efficient as you are taking the heat from one component and using it on the next component, thus not really cooling the second part.
In a parallel connected system each component is connected individually to the radiator. The coolant only has to cool each component individually thus being much more efficient. The side effect of this is that it requires a lot more piping and can sometimes need a second pump.
The other major component that comes with these is the water tank, radiator and pump. The tank and pump are usually about the same size as a high end CPU cooling fan. The radiator, depending on how big you size up the system can be from the size of a typical HDD to about 3 HDDs in size. You can cool the radiator either passively by having enough airflow or enough fluid in the system. If neither of those are available you can always add fans to it.
The coolant itself is usually distilled water. Because of the presence of water there’s always a risk that chemical reactions between the metal cooling pads and pump parts can take place and that you create the perfect habitat for bacteria to thrive. As such you need to add chemical and corrosion protection to the water. Some people also add coloring to the water to make it any color they like.
While I do agree with everybody that water cooling is very good, I do feel it is too much of a hassle, too expensive and dangerous to be practical. Each time you change anything in your CPU/GPU combination you have to basically reinstall the setup. This is without considering the initial setup where you have to find ways to connect everything up without getting in the way or leaking. If you spring the smallest leak either during setup or in operation you take your PC out of operation for at least 24 hours until everything can dry up. This lead us to our next cooling method that is even more impractical.
Oil submerged
Submerged oil cooling does just what the name implies. You take a fish tank that is the right size, put your motherboard with major components attached inside and fill the tank with mineral oil. Due to design limits and risk, storage devices and optical drives have to stay outside.
Because mineral oil doesn’t conduct electricity like water, it acts like a good medium to submerge electronics into. The typical air fans still work while submerged and you can use them as is.
The heat is dissipated inside the oil and heats it up. If the aquarium you are using is large enough you can get away without extra cooling and basically have passive cooling over night. To get the heat out of the tank you have to use a radiator and pump just like in the water cooled setup. This cooling method is nearly completely silent.
The major problem with this setup, while very effective, is that it makes working on your motherboard at a later time quite a messy business. You basically make it and forget it. You have to be 100% sure that the setup you want to run is what you want. You can reuse the components on later air cooled setups, but they will always retain that oily finish.
Conclusion
Depending on what your priority is, cooling is one of those things you really need to consider upfront when building a gaming machine.
If pure performance is your main concern and noise doesn’t bother you then get yourself plenty of fans and large enough cooling elements. There are plenty of well sized coolers out there. Airflow through the case is very important even with plenty of fans. Keeping everything neat and tidy is desired here.
If on the other hand having a silent PC is what you desire then you can optimize your setup to such an extent it can still achieve the desired results with the absolute minimum of moving parts.
